Impression Data
The impression data feature was introduced in Unleash 4.7. It is available in JavaScript-based proxy clients and some server-side SDKs. Please refer to the SDK compatibility table for an overview of server-side SDKs that support it.
Unleash can provide you with impression data about the flags in your application. Impression data contains information about a specific feature flag activation check: The client SDK will emit an impression event when it calls isEnabled or getVariant. Some front-end SDKs emit impression events only when a flag is enabled.
Older versions of the front-end SDKs and other SDKs that connect the Unleash proxy or the Unleash front-end API would not emit impression events when a flag is disabled.
This is because impression data is a per-flag setting and the Proxy and front-end API only transmit information about flags that are enabled. As such, the SDK will never know that it should emit an impression event if a flag is disabled.
Some of the front-end SDKs now include a include a configuration property that lets you turn on impression data for all flags regardless of whether they're enabled or not.
Impression data was designed to make it easier for you to collect analytics data, perform A/B tests, and enrich experiments in your applications. It contains information about the feature flag and the related Unleash Context.
Impression data is opt-in on a per-flag basis. Unleash will not emit impression events for flags not marked as such. Once you've turned impression data on for a flag, you can start listening for impression events in your client SDK.
Impression event data
There's two types of impression events you can listen for:
The getVariant event contains all the information found in an isEnabled event in addition to extra data that's only relevant to getVariant calls.
This table describes all the properties on the impression events:
| Property name | Description | Event type |
|---|---|---|
eventType | The type of the event: isEnabled or getVariant | All |
eventId | A globally unique id (GUID) assigned to this event. | All |
context | A representation of the current Unleash Context. | All |
enabled | Whether the flag was enabled or not at when the client made the request. | All |
featureName | The name of the feature flag. | All |
variant | The name of the active variant | getVariant events only |
Example isEnabled event
{
  eventType: 'isEnabled',
  eventId: '84b41a43-5ba0-47d8-b21f-a60a319607b0',
  context: {
    sessionId: 54085233,
    appName: 'my-webapp',
    environment: 'default'
  },
  enabled: true,
  featureName: 'my-feature-flag',
}
Example getVariant event
{
  eventType: 'getVariant',
  eventId: '84b41a43-5ba0-47d8-b21f-a60a319607b0',
  context: {
    sessionId: 54085233,
    appName: 'my-webapp',
    environment: 'default'
  },
  enabled: true,
  featureName: 'my-feature-flag',
  variant: 'variantA'
}
Enabling impression data
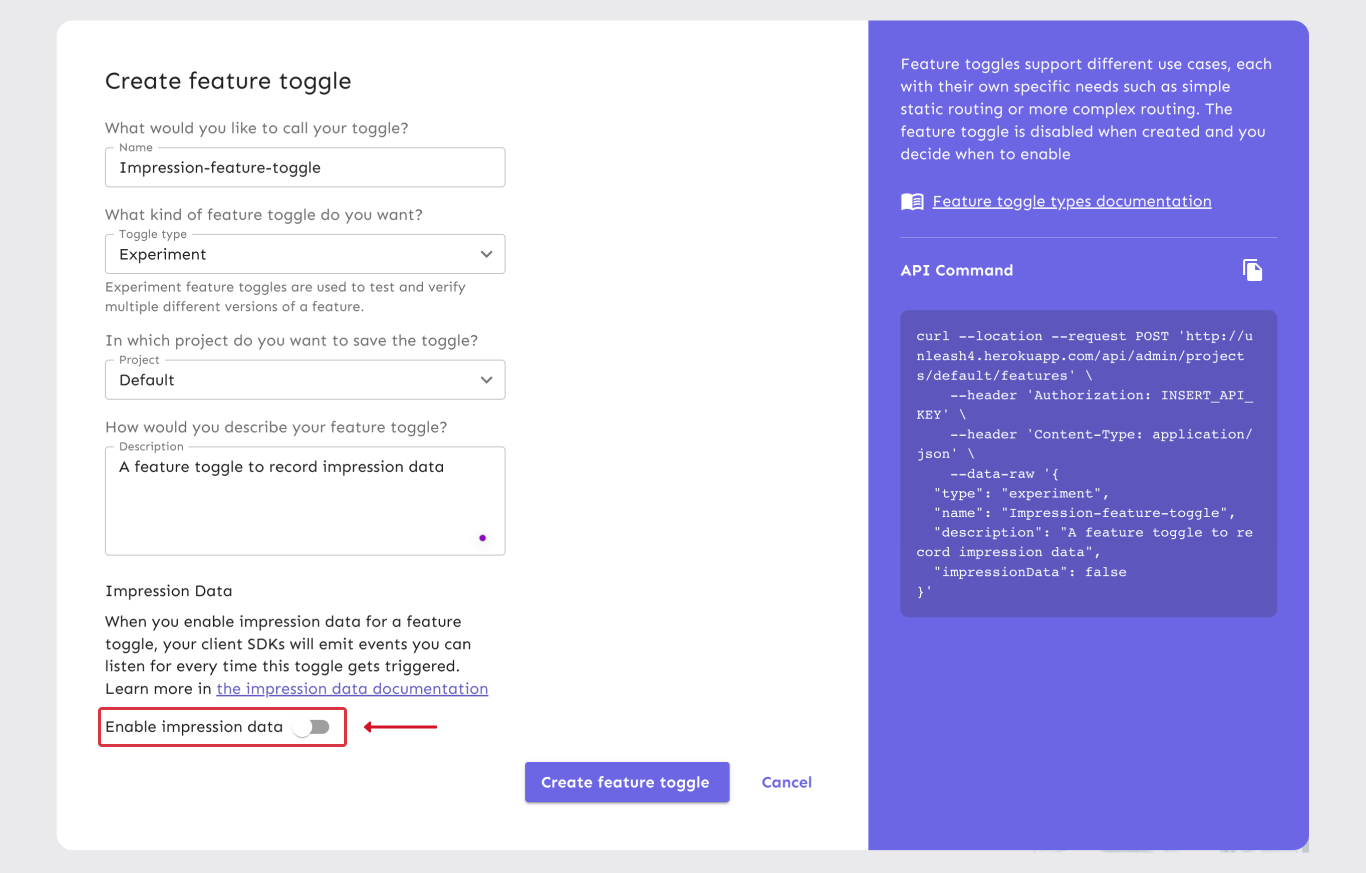
Impression data is strictly an opt-in feature and must be enabled on a per-flag basis. You can enable and disable it both when you create a flag and when you edit a flag.
You can enable impression data via the impression data flag in the admin UI's flag creation form. You can also go via the the API, using the impressionData option. For more detailed instructions, see the section on enabling impression data in the how-to guide for capturing impression data.

Example setup
The exact setup varies depending on your client SDK. The below example configures the [Unleash Proxy client../reference/sdks/javascript-browser) to listen for impression events and log them to the console. If "my-feature-flag" is configured to emit impression data, then it will trigger an impression event as soon as Unleash is ready.
const unleash = new UnleashClient({
  url: 'https://eu.unleash-hosted.com/hosted/proxy',
  clientKey: 'your-proxy-key',
  appName: 'my-webapp',
});

unleash.start();

unleash.on('ready', () => {
  unleash.isEnabled('my-feature-flag');
});

unleash.on('impression', (event) => {
  // Capture the event here and pass it to an internal data lake or analytics provider
  console.log(event);
});